This post contains affiliate links. If you buy through them, I may earn a small commission at no extra cost to you. As an Amazon Associate I earn from qualifying purchases.
Feeding gear can take over your registry—and your kitchen—quickly. After three kids, my priorities are pretty simple: bottles your baby will actually take, supplies that are easy to clean, and a comfortable place for meals when the time comes.
This baby feeding essentials guide covers what to register for now, what can wait until solids, and the extras I would buy only if they solve a problem. Whether you breastfeed, formula-feed, pump, or combine them, you can start small and adjust as you learn what works.
Baby Feeding Registry Checklist
Start with:
☐ small selection of bottles
☐ space to air dry parts
☐ bottle brush
☐ a few burp cloths
Add based on your feeding plans:
☐ pumping and milk storage supplies
☐ formula feeding supplies
For starting solids (~6 months):
☐ high chair
☐ a small cup
☐ silicone mat
☐ wipeable bibs
☐ baby spoons
☐ baby plate and/or bowl
Decide later:
☐ countertop sterilizer
☐ bottle warmer
☐ formula machine
☐ baby food maker
Baby Bottles: Start Small Before Buying a Set
My daughter wasn’t picky about bottles; my son was a different story. That is why I recommend trying one or two bottles from a few brands before buying a large matching set. Once you know what your baby accepts, you can build up enough for your feeding and washing routine.
- Cleaning: Count the pieces you will take apart and wash after each feed. Extra valves can mean extra work.
- Material: Consider the weight, feel, care instructions, and whether your childcare provider accepts glass.
- Nipple flow: Follow your baby’s feeding cues rather than assuming the age on the package is a deadline to move up.
- Compatibility: If pumping directly into bottles matters to you, check your exact pump, bottle, and adapter combination.
In our family, Lansinoh worked well for my bottle-picky son, while my oldest daughter liked Avent. My third child was less picky and I preferred Comotomo with her. Those are personal experiences, not a guarantee that the same bottle will suit your baby.
For a starting point, you can browse Lansinoh or Comotomo. I prefer comparing a few practical options over registering for every bottle that promises to be “breast-like.”
Before choosing: My Baby Bottle Buying Guide walks through materials, nipple shapes, flow, and venting so you can narrow down the options.
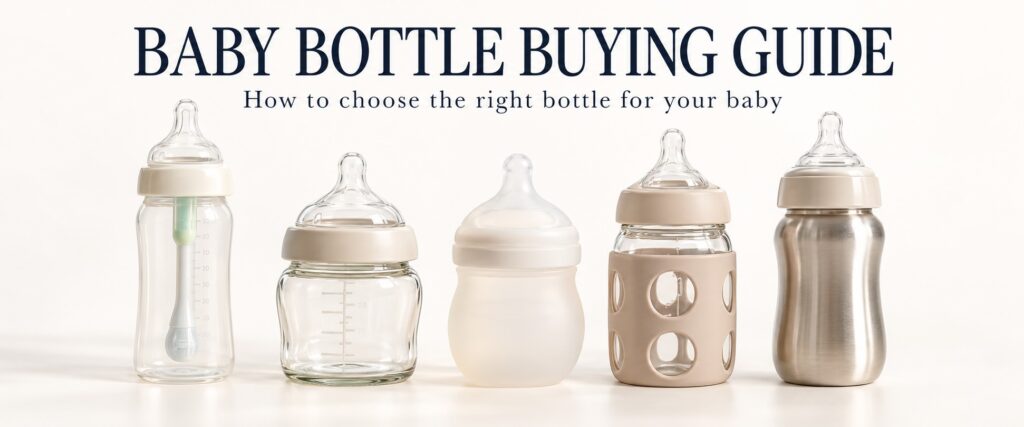
If you plan to nurse or pump, see my Breastfeeding Essentials for those supplies. For help with bottle refusal or feeding difficulties, your pediatrician or a qualified lactation professional can offer advice for your baby.
Bottle Cleaning & Drying:
Make the Daily Routine Easier
When you are washing bottles or pump parts several times a day, a simple setup earns its counter space. We used a Boon Grass drying rack with drying accessories. I liked the convenience, even if it added one more thing to the kitchen counter. But if I were to do it again, I’d get something a little more compact.
- Dedicated bottle brush: Choose one that reaches the bottom of your bottles and can stand up on the counter to air-dry.
- Separate wash basin: Some people like this for washing feeding parts without putting them directly in the sink. I never had one, and I never put parts in the sink either.
- Drying space: Choose a rack you can clean easily, with room for your bottles and small parts.
- Dishwasher basket: Helpful for small parts when the manufacturer says they are dishwasher-safe.


Short on counter space? This is a vertical option worth looking at. Consider: whether its layout fits the bottles and pump parts you actually use.


Cleaning and sanitizing are different. CDC recommends cleaning bottles after each feeding and letting parts air-dry completely. Sanitizing is especially important for babies younger than 2 months, babies born prematurely, and babies with weakened immune systems. Use a method approved by the item’s manufacturer; see CDC’s cleaning and sanitizing instructions.
Burp Cloths: A Few to Start
My daughter rarely spit up. My son went through plenty of burp cloths. Start with a small supply and add more if laundry starts to feel constant. Soft, absorbent, easy-to-wash cloths matter more than a perfectly coordinated set.
My registry tip: With all three of my kids, I received personalized burp cloths after they were born. I would leave room for gifts before registering for a huge stack.
High Chairs: Choose for Your Space and Cleanup Routine
I registered for a highly recommended high chair before my first baby arrived, but I would not choose the same one again. If you are undecided, this is a purchase you can revisit closer to starting solids. CDC recommends introducing solids around 6 months, when babies show developmental signs of readiness.
We liked having a clip-on chair at our kitchen island and a separate chair at the table. You may only need one. Think about where you actually eat before buying two places for baby to sit.
- Everyday cleanup: Look at seams, straps, cushions, and the space under the tray—not just the wipeable seat.
- Fit: Consider upright seating, support, and an adjustable footrest. Follow the chair’s age, size, and developmental requirements.
- Space: Measure the footprint, including legs that stick out. Decide whether you need to fold or move it.
- Long-term use: Compare a simple high chair with one that converts into a chair for an older child.
- Total cost: Check which baby seat, harness, tray, and other accessories are included.
Freestanding High Chairs

This is my favorite of the high chairs I have used. I liked the adjustable seat and footrest, the easy cleanup, and being able to keep using it as my kids grew.
Best for: families who want an adjustable chair to use beyond the baby stage.
Consider: the upfront cost and which age-appropriate accessories your bundle includes.


Clip on Chairs
These clip onto a compatible counter or table instead of standing on their own legs. They are worth considering for travel or a dining space where a freestanding chair is awkward.
Best for: families who want a portable table seat.
Consider: table compatibility is essential. These exclude glass tables, loose tabletops, single-pedestal tables, and several other surfaces.


Buying secondhand? Check the exact model for recalls and make sure all required parts and instructions are present.
Starting Solids: Bibs, Bowls & Baby Spoons
You do not need a full cabinet of tableware before your baby arrives. Start with a few pieces that suit your high-chair tray and how you plan to serve food.
Washable bibs
I like bibs with a pocket for catching food. My favorite was the OXO Tot Roll-Up Bib because the upper part felt less bulky and allowed more movement. A longer smock-style bib can be useful for particularly messy meals. Consider: how easily both the neck area and pocket wash and dry.
A simple bowl or plate
I like the ezpz Mini Mat as a combined placemat and divided plate. Best for: keeping the place setting simple. Consider: measure your tray before buying; suction also depends on the surface.
Baby spoons and a small cup
Choose utensils that are easy for you to use and, later, easy for your baby to hold. NumNum pre-spoons are one option to compare with a simple baby spoon. You do not need several different sets at the start.
For our family’s experience, read my baby-led weaning post. Whatever approach you choose, stay with your baby during meals and use food textures and sizes suited to their development. CDC’s guide to introducing solids is a helpful starting point for readiness and food preparation.
Optional Feeding Extras: Buy for a Specific Need
Insulated bottle bag
Useful for outings or childcare when you need to transport milk. Pair an insulated cooler with frozen ice packs; insulation alone does not keep milk cold indefinitely. Follow CDC’s breast milk storage guidance and the separate formula preparation and storage guidance for the milk you are carrying.
Bottle warmer
We never needed one because our kids accepted bottles without warming. If yours prefers warm milk, a warmer may be convenient. Breast milk and formula do not have to be warmed, and neither should be microwaved; follow the linked CDC guidance for safe preparation.
Countertop sterilizer
We bought one, used it a few times, and eventually gave it up. I would treat the appliance as optional, while still planning how to sanitize feeding items when needed. Depending on the product’s instructions, boiling, steam, or an appropriate dishwasher cycle may be alternatives. A dedicated machine can still be worthwhile if it makes your daily routine easier.
Baby-food maker
I would first see whether a blender, food processor, or fork you already own does the job. A dedicated appliance may be convenient, but it is another purchase to clean and store. And this is IF you are even going to do purees. We opted to go more of a baby-led weaning approach with our kids and didn’t feed them purees at home.
Formula machine
I have not personally used one, so I would not make it a default registry recommendation. Before deciding, compare its cleaning requirements and formula compatibility, and follow the formula manufacturer’s preparation instructions.
Feeding tracker
A simple app or phone note can help you remember feeds and diaper changes during those sleepy early weeks. Use it if it makes life easier; you do not need an elaborate tracking system.
On a budget? Where you can save:
You do not need every feeding gadget to have a setup that works. Here is where I would keep spending simple:
- Try bottles before buying a big set. Start with a few, then buy more once you know what your baby takes. An unused bargain bundle is not a bargain.
- Wait on burp cloths. Your baby may not spit up much. And any soft hand towel can be used as a burp cloth. Softness and absorbency matter more than matching prints or personalization.
- Start with one feeding chair. Choose for fit and easy cleanup; add a travel or second chair only if your routine calls for it.
- Keep tableware minimal. You really don’t “need” any of it. A few bibs and baby spoons are more than enough to start. Skip the big coordinated collection.
- Wait on extra appliances. Revisit gadgets only when you know what problem they would solve.
What to Read Next
- Baby Bottle Buying Guide — Narrow down materials, nipple shapes, and flow before choosing bottles.
- Breastfeeding Essentials — Plan the supplies you may want for nursing and pumping.
- Breastfeeding Basket Checklist — Put the things you reach for most within easy reach.
My take: Start with a workable feeding and cleaning setup, then let your baby and your routine guide the extras. You can always add another bottle or bowl later.